The Scoring System page allows the user to view or update project settings. The data displayed on this page is the most current data being used on the project. When a project is first created the system applies a default setting. The default project settings can be changed by applying a portfolio template or manually adjusting it in the Scoring System page. The Scoring System will be locked once a threat or opportunity has been scored, and no changes can be made to the Scoring System page. The Scoring System page in the PRC Enterprise Risk Register can be viewed only by those users who have either Read/Write or View access. Users with only Read/Write access can edit probability and tolerance levels, edit impacts, edit the risk matrix, add new impacts and delete additional impacts. Users designated with View Access may view probability and tolerance levels, view impacts and also view the risk matrix.

Figure 1.1

Figure 1.2
Import from Templates:
This functionality is used to assign the Threat/ Opportunity scoring templates created in the portfolio scoring system to the selected project. Once the threats or opportunities are added to the project, then this option will not be there.
Steps:
- Project Settings —> Scoring System
- Click the IMPORT FROM TEMPLATES button. (Figure 1)
- Select a template and click DONE to assign the selected template or click Cancel.
Copy from Threat Template:
This functionality is used to copy threat scoring template of the selected project and assign that template to the selected project´s opportunity scoring template. This button is not available, if any opportunity is added to the project.
Steps:
- Project Settings —> Scoring System
- Click the COPY FROM THREAT TEMPLATE button. (Figure 1.2)
Copy from Opportunity Template:
This functionality is used to copy opportunity scoring template of the selected project and assign that template to the selected project´s threat scoring template. This button is not available, if any threat is added to the project.
Steps:
- Project Settings —> Scoring System
- Click the COPY FROM OPPORTUNITY TEMPLATE button. (Figure 1.1)
View Level Definitions:
To view probability and tolerance levels, click the VIEW LEVEL DEFINITIONS button shown in the Probability & Tolerance Scales section. (Figure 1) A pop up shown in Figure 2 appears. If the Level Definitions have been modified, click the SAVE button to save the changes.

Figure 2
To view impact levels, click the VIEW LEVEL DEFINITIONS button shown in the Impacts section. (Figure 1) A pop up appears. (Figure 3) If the checkbox selected for Apply full name to all Impacts, the current full name applied to cost, schedule and additional impacts. This name can be viewed in the score section´s impact dropdown while adding the risk details. Click the SAVE button to save any modifications to the View Level Definitions.
If the checkbox is not selected, click the NEXT button in Figure 3. A pop up appears. (Figure 4) The modifications of cost, schedule and additional impacts can be done individually and click the SAVE button.

Figure 3

Figure 4
Edit Probability & Tolerance:
While editing Probability & Tolerance fields, such as Number of Groups, Lower Threshold and Upper Threshold, the color is unlocked.
Steps:
- Project Settings —>Scoring System
- Click the EDIT button under Probability and Tolerance scale sections. (Figure 1)
- After the data is modified, click the SAVE button.
- The color is set by clicking on the corresponding color shown beside each field. An example of the color picker is displayed in Figure 5.
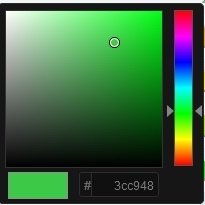
Figure 5
Reload button under Tolerance Scale section is to reload the default threshold values and colors for each number of groups. This button is shown only while clicking EDIT button under Tolerance. (Figure 6)

Figure 6
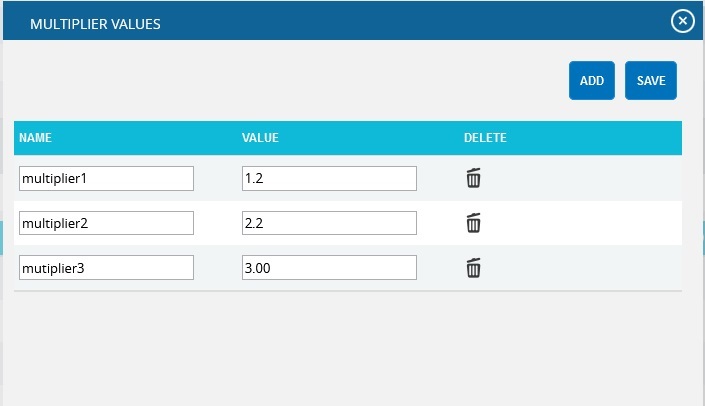
Multiplier Settings:
Multipliers are user input values. To give multiplier values, click MULTIPLIER SETTINGS button. (Figure 1) When the link is clicked, Multiplier values dialog box appears where the user can add, save and delete values. (Figure 7)
Edit Impacts:
When editing impacts, fields such as Number of Groups, Lower Threshold, Upper Threshold, Duration Type, Name and Description of Additional Impact are unlocked. The field Number of groups will be locked if a Threat/Opportunity has been assigned a score.
Cost Type for Cost:
The Cost Type for cost has values Percentage and Currency, where Currency is the default value.
If the assigned template for the project has value Percentage for the field Cost Type, then the cost values will be expressed in corresponding percentage of total cost of project. The formula for percentage calculation of each threshold value is:
[Percentage value * Project cost]
If the assigned template for the project has value Currency, cost values remain unchanged.
Duration Type for Schedule:
The Duration Type field for schedule has values for Days, Weeks, Months, Year and a Percentage where the default value is Days.
If the assigned template for the project has a value Percentage for Duration Type then the Schedule values will be converted to corresponding percentage of Number of days between start date and end date of a project according to the Default Duration given in the project details.
The formula for percentage calculation of schedule of each threshold value is:
[Total Duration * Percentage value]
Where, Total Duration is:
Total days = project end date – project start date
For Days type, total number of days itself.
For Week type, Total Duration = total days/7
For Hours type, Total Duration = total days * 24.0
For Month type, Total Duration = total days /30
For Year type, Total Duration = total days /365
Steps:
- Project Settings —>Scoring System
- Click the EDIT button under Impacts section. (Figure 1)
- After the data is modified, click the SAVE button.
Add New Impact:
This functionality is used to add a new additional impact.
Steps:
- Project Settings —>Scoring System
- Click the ADD button to add a new impact. (Figure 1)
- After entering the details, click the SAVE button. (Figure 8)
![]()
Figure 8
Delete Impacts:
This functionality is used to delete additional impacts. Additional impacts can be deleted only by those users who have Read/Write access for delete.
Steps:
- Project Settings —>Scoring System
- Click the Close icon to delete additional Impacts. (Figure 1)
- After you receive the confirmation message, click the OK button to delete the breakdown structure. To cancel, click the Cancel button.
Edit Risk Matrix:
This section allows you to define the scores based on the Probability and Impact position.
Steps:
-
Project Settings —>Scoring System
-
Click the EDIT button under Risk Matrix. (Figure 1)
-
After the data is modified, click the SAVE button.