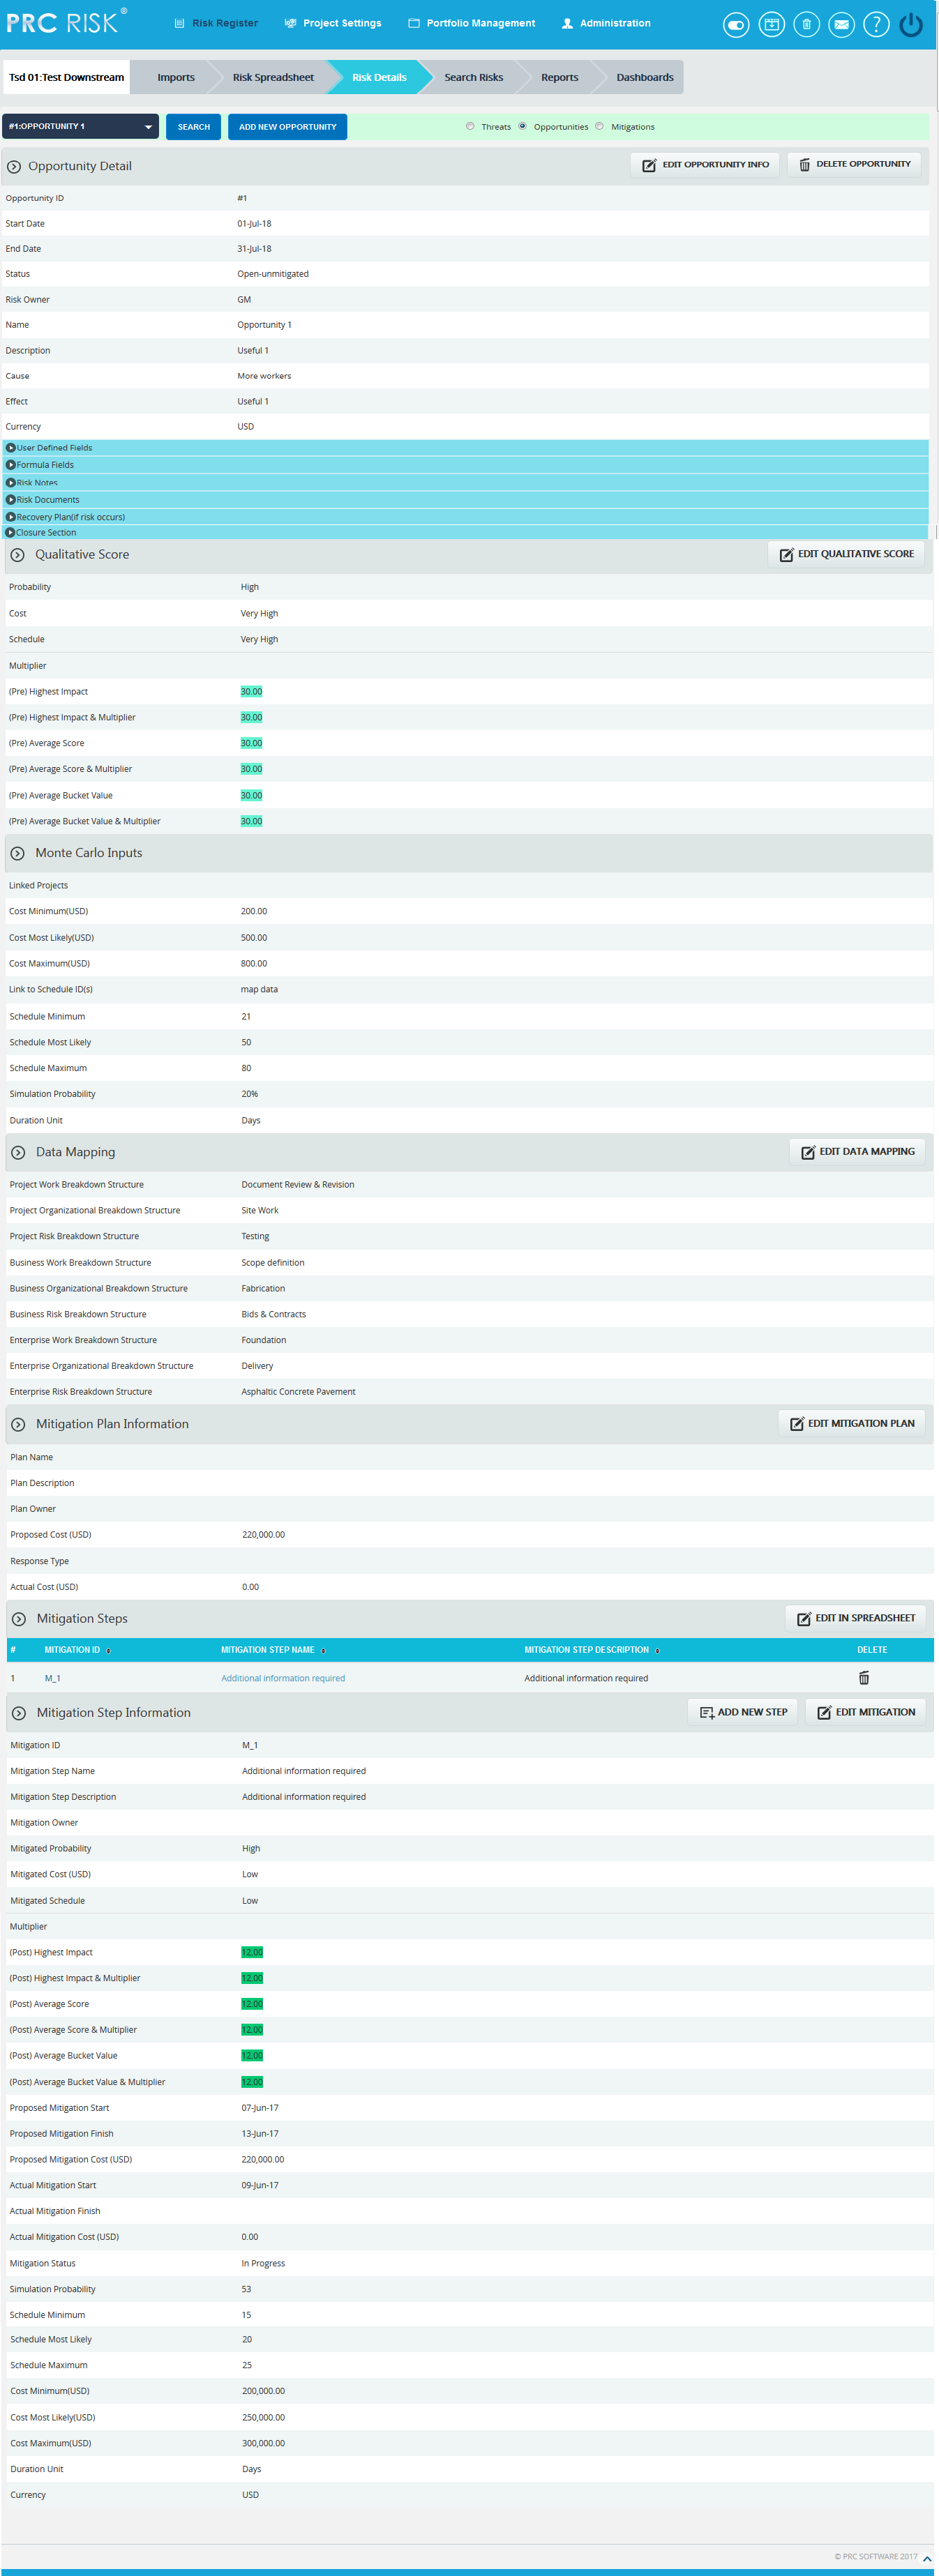
The Risk Details (Opportunities) page allows you to Search, Edit, Map, Add, and Delete Opportunities in the selected project. To view project data, a project must be first selected from the Select Project section of the menu. The user will have access only to those projects that have been assigned by the System Administrator. Users with Read/Write access can create new opportunities, edit opportunities, delete opportunities, and send email. Users designated with View access can view the opportunity details, and send email.
Navigate Page:
To go to the Risk Details (Opportunities) page, navigate from the Risk Details (Threat) page.
Steps:
- Risk Register —>Risk Details
- Click the Opportunities radio button to navigate to the Risk Details (Opportunities) page. (Figure 1)
To go to the Risk Details (Threat) page or Risk Details (Mitigations) from the Risk Details (Opportunities) page:
Click the Threats radio button to navigate to the Risk Details (Threat) page. (Figure 1)
Or
Click the Mitigations radio button to navigate to Risk Details (Mitigations) page. (Figure 1)
Searching For Opportunities:
Searching for Opportunities in Risk Details (Opportunities) can be done in two ways. The Search function allows the user to search for an opportunity based on a keyword. This method is faster when you are working with large amounts of data. The Select function is commonly used for databases with less data and when the search objective is known.
Using the search function:
Steps:
-
Risk Register —>Risk Details
-
Click the Opportunities radio button to navigate to the Risk Details (Opportunities) page. (Figure 1)
-
Click the Search button. (Figure 1)
-
Enter the search keyword (ID or name) and click the Search button and select the required opportunity. (Figure 2)

Figure 2
The Show All button in the search area lists all opportunities available (by default). (Figure 2) In order to Filter or Sort opportunity details displayed in the search area, click the Advanced Search button. The search area changes to that shown in Figure 3.

Figure 3
To Filter the search area contents:
Steps:
- Risk Register —>Risk Details
- Select the required column. (Figure 3)
- Enter the value based on which filtering is to be done. (Figure 3)
- Click the Filter button. (Figure 3)
To Sort the data:
Steps:
- Risk Register —>Risk Details
- Select the required column. (Figure 3)
- Select the order (Ascending/Descending) in which the sorting is to be done. (Figure 3)
- Click the Sort button (Figure 3) to sort the data in the search area.
- To go to the previous search page shown in Figure 2, click the Basic Search button. (Figure 3)
Using the select function (dropdown list):
Steps:
- Risk Register —>Risk Details
- Click the Opportunities radio button to navigate to the Risk Details (Opportunities) page. (Figure 1)
- Click the Select Opportunity dropdown. (Figure 1)
- Select the required Opportunity from the list shown.
Creating a new Opportunity:
Creating a new opportunity in the Risk Register is quick and easy. The Risk ID is a required field to save the opportunity.
Steps:
- Risk Register —>Risk Details
- Click the Opportunities radio button to navigate to the Risk Details (Opportunities) page. (Figure 1)
- Click the ADD NEW OPPORTUNITY button. (Figure 1)
- After entering opportunity details, click the SAVE button. (Figure 1)
The risk owner has an editable select box where the user can either enter or select the Risk Owner name. (Figure 4)
![]()
Figure 4
Editing Opportunity information:
When editing opportunity details in Risk Details (Opportunities), all fields under the Opportunity Detail section, User Defined Fields section, Recovery Plan section, Qualitative Score section, Monte Carlo Inputs section and Data Mapping section will be unlocked and the user will be able to modify those fields.
Steps:
- Risk Register —>Risk Details
- Click the Opportunities radio button to navigate to the Risk Details (Opportunities) page. (Figure 1)
- Select the required opportunity.
- Click the EDIT OPPORTUNITY INFO button. (Figure 1)
- After the data is modified, click the SAVE button. (Figure 1)
User Defined Fields Section:
Any user defined or custom field will be shown in this section. There is no limit to the number of user defined fields. User Defined Fields are added as follows:
Project settings—> Custom Fields
Formula Fields Section:
Any formula field will be shown in this section (Figure 5). There is no limit to the number of formula field. Formula Fields are added as follows:
Project settings –> Custom Fields

Figure 5
Risk notes Section:
Users can add a short Risk Note. The note will be saved with the user name and a time stamp for future tracking purposes. Risk Notes once added cannot be edited and can only be deleted by a Super User. The Super User can delete Risk Notes by clicking the Close button. (Figure 6)

Figure 6
To Add New Note, check the following steps below:
Steps:
-
-
Risk Register —>Risk Details
-
Click the Opportunities radio button to navigate to the Risk Details (Opportunities) page. (Figure 1)
-
Select the opportunity, if the opportunity is already created.
-
Click the ADD NEW NOTE link to add risk notes. (Figure 6) A pop up shown in Figure 7 appears.
- Enter the note and click the ADD NOTE button. (Figure 7)
-

Figure 7
Risk Documents Section:
This functionality is used to upload any additional documents required. It can be of type xls, csv, xer, mpp, jpeg, jpg, png, tif, gif, txt, doc, docx and pdf.
Steps:
-
Risk Register —>Risk Details
-
Click the Opportunities radio button to navigate to the Risk Details (Opportunities) page. (Figure 1)
-
Click on the Risk Documents section. (Figure 1)
-
Click the BROWSE button (Figure 8) to select the required file.
-
Click the UPLOAD FILE button to finish. (Figure 8)

Figure 8
Recovery Plan Section:
The Recovery Plan section is to document what will be done if the mitigation is not successful and the risk event does occur. It also documents the steps the team should be prepared to take if the risk becomes a reality.
Closure Section:
The Closure Section is used for documenting the actual impact of the risk event on the project. Fully documenting this section will allow similar projects in the future to learn and benefit from the lessons learned.
Qualitative Score Section:
Qualitative Score fields include Probability, Cost, Schedule and Additional Impacts, if any. (Figure 1) These fields are used to set the pre-mitigated score. If Probability and Impacts have a value of either Undefined or No Risk, the risk score will be zero.
Map schedule ID:
The Schedule ID called Activity ID is used for simulation purposes.
To map Activity ID:
Steps:
-
Click the MAP DATA link shown in Figure 9. A pop up shown in Figure 10 appears.
-
Click the checkbox to select the corresponding activity ID you want to map for your opportunity, then click the Save button to finish. (Figure 10)
![]()
Figure 9

Figure 10
Data Mapping Section:
The Data Mapping section shows which Breakdown Structure the selected opportunity is mapped to, and at what level (Project, Business Unit, or Enterprise). It is not required to map data, but it will be useful when the time comes to report at the portfolio level.
Project Organizational Breakdown Structure, Project Work Breakdown Structure and Project Risk Breakdown structure details are added from the page:
Project Settings —>Project Breakdown Structure
Business Organizational Breakdown Structure, Business Work Breakdown Structure, Business Risk Breakdown Structure, Enterprise Organizational Breakdown Structure, Enterprise Risk Breakdown Structure, Enterprise Work Breakdown Structure are added from the page:
Portfolio Management —>Project Breakdown Structure
Enterprise Risk details are added from page:
Portfolio Management —> Reports —> Other Risk Reports —> Enterprise Risk List
To Map data:
Steps:
- Click the MAP DATA link to map data for the corresponding field. (Figure 1)
- Select the checkbox corresponding to the data to be mapped. (Figure 11)
- Click the SELECT WBS button (if Work Breakdown Structure), SELECT OBS button (if Organizational Breakdown Structure), SELECT RBS button (if Risk Breakdown Structure) to finish. (Figure 11)
The step described above applies to all Organizational Breakdown Structure, Work Breakdown Structure and Risk Breakdown Structure fields.

Figure 11
Mitigation Details:
Users can track their Mitigation Plan or individual mitigation steps. The Mitigation Plan is a compilation of the individual steps below it. The Mitigation Plan cost is rolled up from the cost of each mitigation step. Tracking mitigation steps creates accountability when the step owner and planned dates are tracked. Reports can be generated to identify all mitigation steps that are currently behind schedule.
The qualitative and simulation scoring fields (Probability, Cost, Schedule, etc.) in the mitigation steps represent the residual risk that remains after a mitigation step is completed. The goal is to mitigate a risk until it is gone, however often this is not possible. It is important to document any residual risk that cannot be removed for the benefit of the project team and the accuracy of Monte Carlo simulations. Any graph that highlights a post-mitigated score will focus on the residual risk after all mitigation steps have been completed. The status of a mitigation step and the actual dates should be updated as the steps are started and finished. Proposed Cost is the sum of all Proposed Cost of the mitigation steps and Actual Cost is the sum of all Actual Cost of the mitigation steps.

Figure 12

Figure 13
Edit Mitigation Plan Information:
This functionality is to edit the mitigation plan information such as Plan Name, Plan Description, Plan Owner, Proposed Cost, Response Type and Actual Cost.
Steps:
- Risk Register —>Risk Details
- Click the Opportunities radio button to navigate to the Risk Details (Opportunities) page. (Figure 1)
- Select the required opportunity.
- Click the EDIT MITIGATION PLAN button. (Figure 12)
- After the data is modified, click the SAVE button. (Figure 13)
Mitigation Steps Information:
Mitigation step information can be added from the Spreadsheet page or can be added from the Risk Details page itself.

Figure 14
Edit In Spreadsheet:
This functionality is to edit, add, delete and export mitigation steps for the selected opportunity in spreadsheet. Click the EDIT IN SPREADSHEET button which navigates to a spreadsheet page.
Steps:
- Risk Register —> Risk Details (Threats)
- Select the required opportunity.
- Click the EDIT IN SPREADSHEET button. (Figure 14)
- Edit, add, delete and export mitigation steps for the selected opportunity as in Spreadsheet View page. (Figure 15)
- Click GO TO RISK DETAILS button to go back to the Advanced View page. (Figure 15)

Figure 15
Add New Step:
This functionality is to add a new mitigation step for the selected opportunity.
Steps:
-
Risk Register —>Risk Details
-
Click the Opportunities radio button to navigate to the Risk Details (Opportunities) page. (Figure 1)
-
Select the required opportunity.
-
Click the ADD NEW STEP button. (Figure 14)
-
After entering opportunity details, click the SAVE STEP button. This button is visible only after ADD NEW STEP button or EDIT MITIGATION button is clicked. (Figure 14)
Edit Mitigation Step:
This functionality is to edit the selected mitigation step of the opportunity selected.
Steps:
-
Risk Register —>Risk Details
-
Click the Opportunities radio button to navigate to the Risk Details (Opportunities) page. (Figure 1)
-
Select the required opportunity.
-
Select the mitigation step that is to be edited.
-
Click the EDIT MITIGATION STEP button. (Figure 14)
-
After entering the opportunity details, click the SAVE STEP button. This button is visible only after the ADD NEW STEP button or EDIT MITIGATION STEP button is clicked. (Figure 14)

Figure 16
Recycle Bin:
To go to the Recycle Bin from Risk Details (Opportunity), click the Recycle Bin icon on top of the page in Figure 1.

Figure 17
Restore Opportunities:
The following steps restore opportunities and remove them from the Recycle Bin and move them back to the pages where the Opportunity details are being shown, such as Risk Details (Opportunities).
Steps:
- Risk Register —>Risk Details
- Click the Opportunities radio button to navigate to the Risk Details (Opportunities) page. (Figure 1)
- Click the Recycle Bin icon to go to Recycle Bin page.
- Select the opportunity to restore.
- Click the RESTORE button to restore the selected opportunity. (Figure 17)
Delete Opportunity from Recycle Bin
The Opportunity deleted from the Recycle Bin will be removed completely from the system.
Steps:
- Risk Register —>Risk Details
- Click the Opportunities radio button to navigate to the Risk Details (Opportunities) page. (Figure 1)
- Click the Recycle Bin icon to go to the Recycle Bin page.
- Select the opportunity to delete.
- Click the DELETE button. (Figure 17)
After you receive the confirmation message (Figure 18), click the OK button. The opportunity will be deleted permanently. To cancel, click the Cancel button. (Figure 18)

Figure 18
Search (Basic Search):
The Search function allows the user to search for an opportunity based on a keyword. This method is faster when you are working with large amount of data. Opportunity details which are deleted from risk details section can be searched based on their Opportunity id, Opportunity Name etc for the particular project
Steps:
- Recycle bin —> Search Risks —> Opportunity
- Click the Search button. (Figure 19)
- Enter the search keyword (which can be the ID or name) and click the Search button and select the required Opportunity. (Figure 19)

Figure 19
Search (Advanced Search):
To filter the search area contents using Advance Search
Steps:
- Select the required field from the dropdown list. (Figure 20)
- Enter the value based on which filtering is to be done
- Click the Filter button the search results are displayed. (Figure 20)
- After using Advance Search user can move to the basic search by clicking on Basic Search. (Figure 20)
To Sort the data
- Select the required column. (Figure 21)
- Select the order (Ascending/Descending) in which sorting is to be done. (Figure 21)
- Click the Sort button to sort the data in the search area. (Figure 21)
To reset the details for filter and sort fields, click the Reset button. (Figure 21)

Figure 20

Figure 21
Email Settings:
This functionality is used to export the entire page to Word and send it by email to the person selected.
Steps:
-
-
Risk Register —>Risk Details
-
Click the Opportunities radio button to navigate to the Risk Details (Opportunities) page. (Figure 1)
-
Select the required Opportunity.
-
Click the Email icon to send the email.
-
Select the user from the drop down list to whom mail should be sent.
-
Enter the message in the Message text area.
-
Select the required fields for the email edit, that can be edited and saved by the recipient. (Figure 22).
- Click the UPDATE FIELDS button to view the Threats and its Mitigation field values that are selected, where the email can be edited. (Figure 22)
-
Click the SEND MAIL button to finish. (Figure 22)
-

Figure 22

Figure 23
Deleting Opportunity:
The deleted opportunities will be moved to the Recycle Bin.
Steps:
-
Risk Register —>Risk Details
-
Click the Opportunities radio button to navigate to the Risk Details (Opportunities) page. (Figure 1)
-
Select the required opportunity.
-
Click the DELETE OPPORTUNITY button. (Figure 1)
-
After you receive the confirmation message (Figure 24) click the OK button. The Opportunity will be moved to the recycle bin. To cancel, click the Cancel button. (Figure 24)
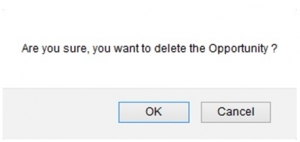
Figure 24
- Select the required fields for the email edit, that can be edited and saved by the recipient (refer Figure 22).