The Custom Fields page allows the user to view or update the project settings. The data displayed on this page is what is currently being used on the project. When a project is first created, the system applies a default setting. The default project settings can be changed by applying a portfolio template or manually adjusting it in the Custom Fields page. When creating a custom field the user will be given the options to choose the data type (text, date, number, currency and list) and location displayed (threat, opportunity, threat and opportunity or mitigation sections). When creating a formula field, the user will be given the options to choose the location displayed (threat, opportunity, or mitigation sections). There are no system defaults for the Custom Fields page.
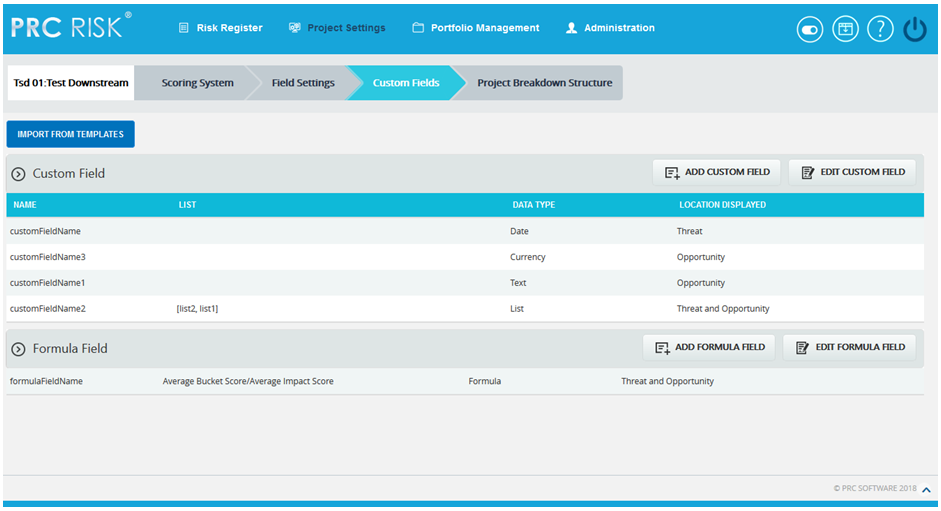
Figure 1
Import from Templates:
This functionality is used to assign the Threat/ Opportunity scoring templates created in the portfolio scoring system to the selected project. Once the threats or opportunities are added to the project, then this option will not be there.
Steps:
- Project Settings –> Custom Fields
- Click the IMPORT FROM TEMPLATES button. (Figure 1)
- Select a template and click DONE to assign the selected template or click Cancel.
Edit Custom Fields:
This functionality is used to edit Custom Fields.
Steps:
-
- Project Settings –>Custom Fields
- Click the EDIT CUSTOM FIELD button.
- Edit the necessary details. For custom fields with data type List, enter the value in the Editable Combo box provided and click the ADD icon to add list values. (Figure 2) To rename the existing value, select any value from the dropdown list and click the RENAME icon after renaming it. Similarly select a list value from the dropdown and click the DELETE icon to delete the value from the list. Also to re-order the list, select the RE-ORDER icon and the re-order List Options box appears. ( Figure 2)
- Click the SAVE button to finish. (Figure 3)
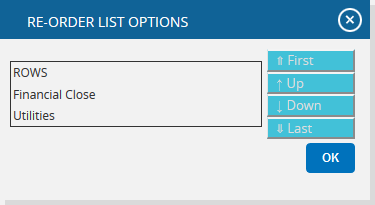
Figure 2
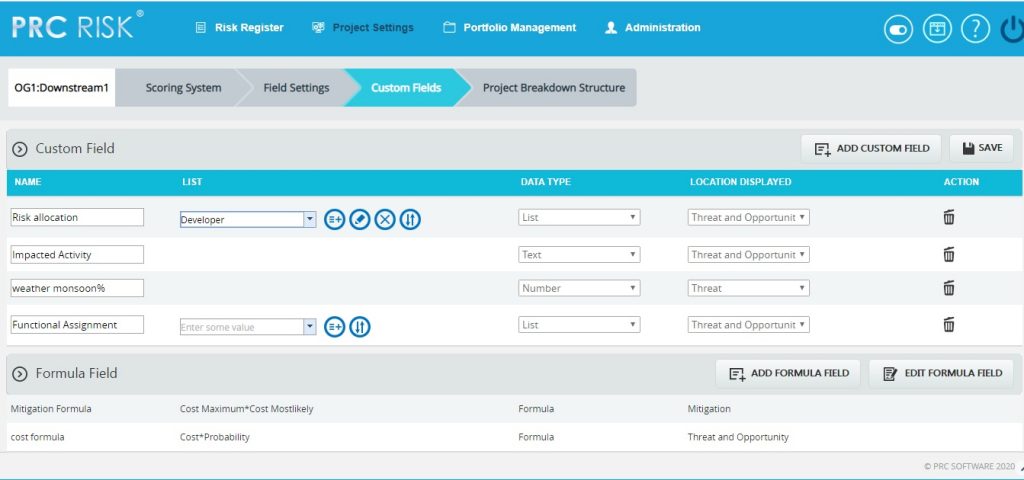
Figure 3
Add Custom Field:
This functionality is used to add new custom field to the selected project.
Steps:
- Project Settings –>Custom Fields
- Click the ADD CUSTOM FIELD button. (Figure 3)
- Enter the Custom Field name in the textbox provided. (Figure 3)
- Select data type from the DATA TYPE drop-down. (Figure 3)
- For the data type List, enter the value in the Editable Combo box provided and click the ADD icon.
- Select location displayed from the LOCATION DISPLAYED drop-down. (Figure 3)
- Click SAVE to finish. (Figure 3)
Delete Custom Fields:
This functionality is used to delete the Custom Fields.
Steps:
- Project Settings –>Custom Fields
- Click the EDIT CUSTOM FIELD button. (Figure 1)
- Click the DELETE icon to delete the required custom field. (Figure 3)
After you receive the confirmation message (Figure 4) click the OK button to delete the custom field. To cancel, click the Cancel button. (Figure 4)
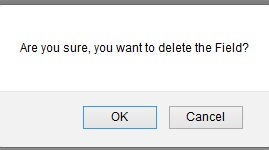
Figure 4
Edit Formula Fields:
This functionality is used to edit Formula Fields.
Steps:
- Project Settings –>Custom Fields
- Click the EDIT FORMULA FIELD button. (Figure 1)
- Edit the formula field name if necessary.
- Formula can be edited by clicking Edit Formula. ADD FORMULA FIELD pop up appears. (Figure 5)
o Edit the necessary changeso Click SAVE button to save the formula or click RESET to clear the formula.o DATA TYPE and LOCATION DISPLAYED cannot be edited.
5. Click the SAVE button to finish. (Figure 6)
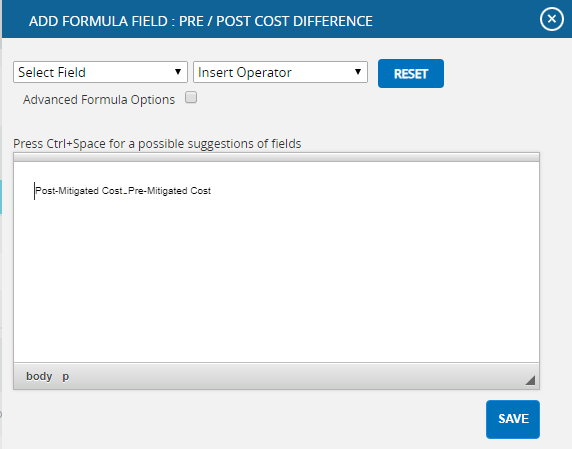
Figure 5
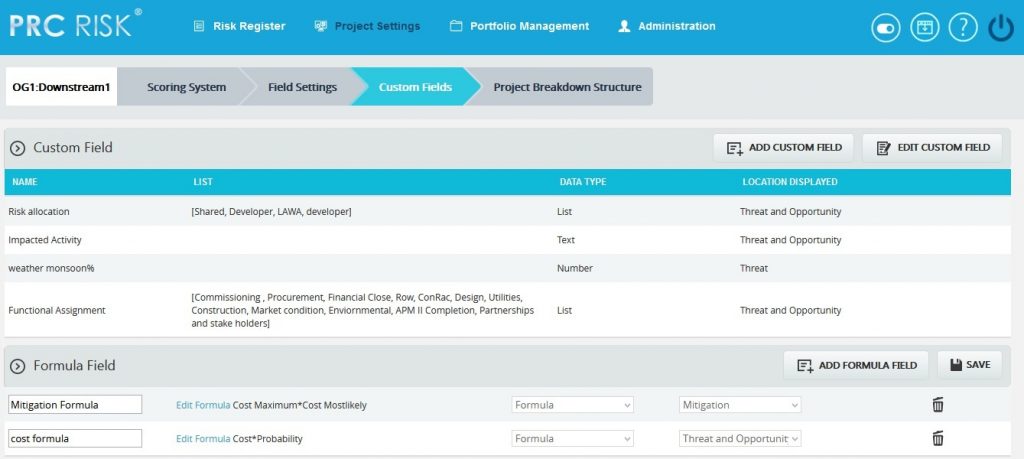
Figure 6
Add Formula Field:
This functionality is used to add new formula field to the selected project.
Steps:
- Project Settings –>Custom Fields
- Click the ADD FORMULA FIELD button. (Figure 8)
- Enter the Formula Field name in the textbox provided. (Figure 8)
The only data type is Formula and the same will be mentioned in the DATA TYPE dropdown
- Select location displayed from the LOCATION DISPLAYED (Figure 8)
- Click Create Formula and ADD FORMULA FIELD pop up appears. (Figure 5)
- Select field from the list and insert the operator as required. (Figure 5)
- Check the Advanced Formula Options, in case any particular value has to be returned in the field according to conditions set.(Figure 7)
- Click ADD CONDITION button for setting a new condition and the value to be returned whenever the formula satisfies this condition.
- The data type of return value has to be selected from the dropdown.
- The conditions can be deleted using Delete link.
- Click SAVE button to save the formula or click RESET to clear the formula.
- Click SAVE to finish. (Figure 8)
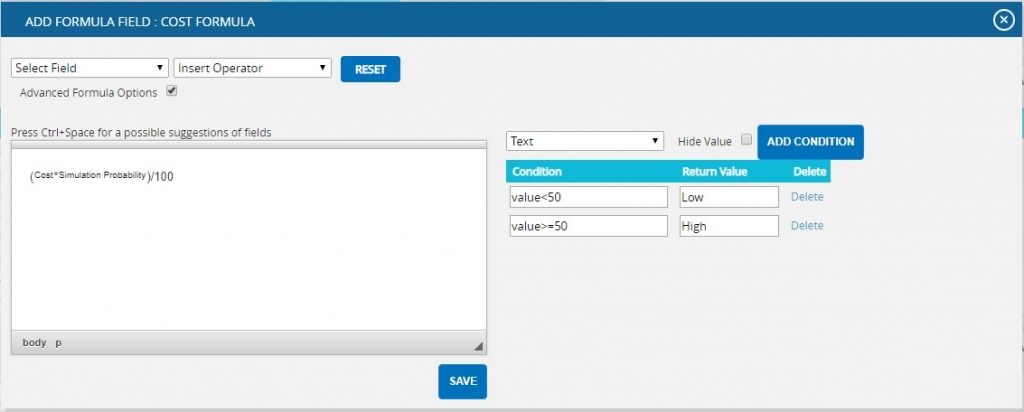
Figure 7
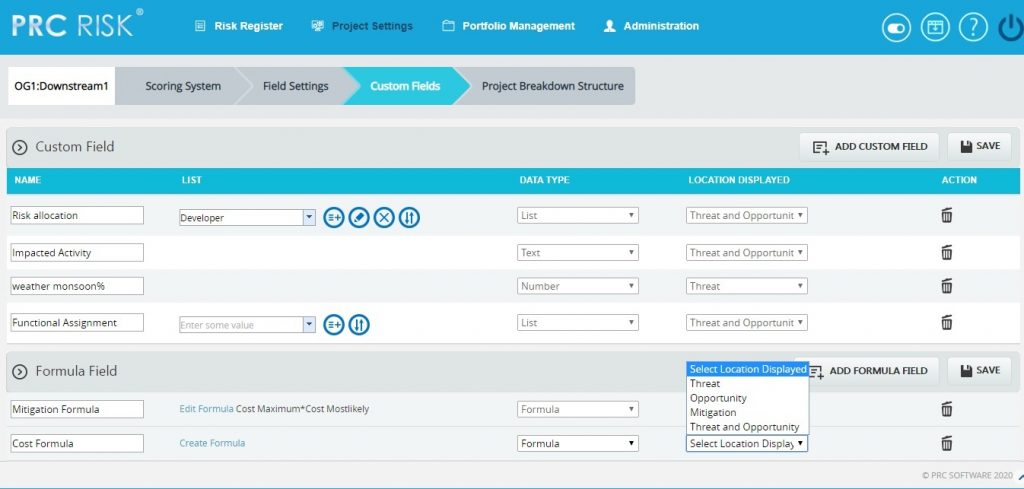
Figure 8
The formula field added here will reflect in Risk Register pages: Risk Spreadsheet, Risk Details & Reports depending on the location selected. If the location selected is mitigation, the formula field will be displayed in Risk Spreadsheet Page ->Mitigations-> Threat / Opportunity and in Risk Details Page->Threat/Opportunity->Mitigation Step Information.
Delete Formula Fields:
This functionality is used to delete the Formula Fields.
Steps:
- Project Settings –>Custom Fields
- Click the EDIT FORMULA FIELD button. (Figure 1)
- Click the DELETE icon to delete the required formula field. (Figure 6)
After you receive the confirmation message (Figure 4) click the OK button to delete the formula field. To cancel, click the Cancel button. (Figure 4)
- custom fields with the data type List, enter the value in the Editable Combo box provided and click the Add button to add list values. To rename the existing value, select any value from the drop down list and click the Rename button after renaming it. Similarly select a list value from the drop down and click the Delete button to delete the value from the list.