The Custom Fields (Portfolio) page allows you to create a template with custom fields or formulas that can be applied to your project. These templates are saved in the system and can be reused for future projects. When creating a custom field, the user will be given the options to choose the data type (text, date, number, currency, list) and location displayed (threat, opportunity, or mitigation sections). When creating a formula field, the user will be given the options to choose the location displayed (threat, opportunity, or mitigation sections).

Figure 1
Searching For Templates:
Searching for templates in the Custom Fields (Portfolio) can be done in two ways. The Search function allows the user to search for a template based on a keyword. This method is faster when you are working with a large amount of data. The Select function is commonly used for databases with less data and when the search objective is known.
Using the search function:
Steps:
- Portfolio Management –> Custom Fields
- Click the SEARCH button. (Figure 1)
- Enter the search keyword (which can be the Template Name or Template Description). Click the SEARCH button and select the required template. (Figure 2)

Figure 2
The SHOW ALL button in the search area lists all the templates available (By default).
Using the select function (drop-down list):
Steps:
- Portfolio Management –> Custom Fields
- Click the Select Template drop-down. (Figure 1)
- Select the required template from the list shown.
Creating a new template:
Creating a new template is quick and easy. The Template Name is a required field to save the template.
Steps:
- Portfolio Management –> Custom Fields
- Click the CREATE NEW TEMPLATE button. (Figure 1)
- After entering template details, click the SAVE TEMPLATE button. (Figure 3)
Edit Template Information:
While editing the details of a template, the fields Template Name and Template Description will be unlocked.
Steps:
- Portfolio Management –> Custom Fields
- Select the required template.
- Click the EDIT TEMPLATE INFO button. (Figure 1)
- After the data is modified, click the SAVE TEMPLATE button to finish. (Figure 4)
Creating Default Template:
This functionality is to create a Master Template. Only once the default template can be created and is done by Super User.
Steps:
- Portfolio Management –> Custom Fields
- Click the CREATE DEFAULT TEMPLATE button. (Figure 1)
- After entering the template details, click the SAVE button.
View Default Template:
To view the Master Template, click the VIEW DEFAULT TEMPLATE button. (Figure 3)
Add Custom Field:
This functionality is used to add a new custom field to the selected template.
Steps:
- Portfolio Management —> Custom Fields
- Select the required template.
- Click the EDIT TEMPLATE INFO button. (Figure 1)
- Click the ADD CUSTOM FIELD button. (Figure 3)
- Enter the custom field name in the textbox provided. (Figure 3)
- Select the data type from the DATA TYPE drop-down. (Figure 3)
- For the data type List, Enter the value in the Editable Combo box provided and click the Add link. (Figure 3)
- Select location displayed from the LOCATION DISPLAYED drop-down. (Figure 3)
- Click the SAVE TEMPLATE button to finish. (Figure 3)

Figure 3
Edit Custom Fields:
This functionality is used to edit custom fields.
Steps:
- Portfolio Management —> Custom Fields
- Select the required template.
- Click the EDIT TEMPLATE INFO button. (Figure 1)
- Edit the necessary details. For custom fields with data type List, enter the value in the Editable Combo box provided and click the ADD icon to add list values. (Figure 3)
- To rename the existing value, select any value from the drop-down list and click the RENAME icon after renaming it. (Figure 4) Similarly select the list value from the drop-down and click the DELETE icon to delete the value from the list. (Figure 5) Also to re-order the list, select the RE-ORDER icon (Figure 6) and the Re-order List Options box appears. (Figure 7)
- Click the SAVE TEMPLATE button to finish. (Figure 8)
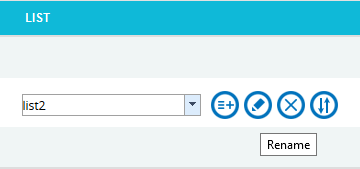
Figure 4
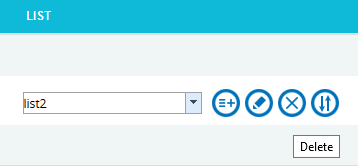
Figure 5
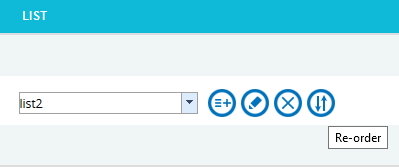
Figure 6
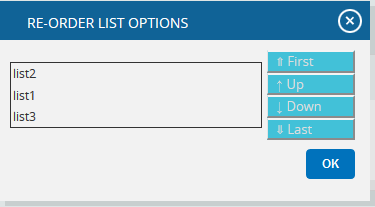
Figure 7

Figure 8
Delete Custom Fields:
This functionality is used to delete the custom fields.
Steps:
- Portfolio Management —> Custom Fields
- Select the required template.
- Click the EDIT TEMPLATE INFO button. (Figure 1)
- Click the Delete icon to delete the required custom field. (Figure 3)
After you receive the confirmation message (Figure 9) click the OK button to delete the custom field. To cancel, click the Cancel button. (Figure 9)

Figure 9
Add Formula Field:
This functionality is used to add a new formula field to the selected template.
Steps:
- Portfolio Management –> Custom Fields
- Select the required template.
- Click the EDIT TEMPLATE INFO button. (Figure 1)
- Click the ADD FORMULA FIELD button. (Figure 10)
- Enter the formula field name in the textbox provided. (Figure 10)
The only data type is Formula and the same will be mentioned in the DATA TYPE dropdown.
- Select location displayed from the LOCATION DISPLAYED (Figure 10)
- Click Create Formula and ADD FORMULA FIELD pop up appears. (Figure 11)
- Select field from the list and insert the operator as required. (Figure 12)
- Click SAVE button to save the formula or click RESET to clear the formula.
- Click the SAVE TEMPLATE button to finish. (Figure 10)
Edit Formula Fields:
This functionality is used to edit formula fields.
Steps:
- Portfolio Management –> Custom Fields
- Select the required template.
- Click the EDIT TEMPLATE INFO button. (Figure 1)
- Click the ADD FORMULA FIELD button. (Figure 10)
- Edit the formula field name if necessary.
- Formula can be edited by clicking Edit Formula. ADD FORMULA FIELD pop up appears. (Figure 11)
- Edit the necessary changes
- Click SAVE button to save the formula or click RESET to clear the formula.
DATA TYPE and LOCATION DISPLAYED cannot be edited.
7. Click the SAVE TEMPLATE button to finish. (Figure 10)

Figure 10

Figure 11

Figure 12
Delete Formula Fields:
This functionality is used to delete the formula fields.
Steps:
- Portfolio Management –> Custom Fields
- Select the required template.
- Click the EDIT TEMPLATE INFO button. (Figure 1)
- Click the ADD FORMULA FIELD button. (Figure 10)
- Click the Delete icon to delete the required formula field. (Figure 10)
After you receive the confirmation message (Figure 13) click the OK button to delete the formula field. To cancel, click the Cancel button. (Figure 13)
6.Click the SAVE TEMPLATE button to finish. (Figure 10)

Figure 13
- For custom fields with the data type List, enter the value in the Editable Combo box provided and click the Add button to add list values. To rename the existing value, select any value from the drop down list and click the Rename button after renaming it. Similarly select a list value from the drop down and click the Delete button to delete the value from the list. (Figure 4)